Mission 4 (Final Challenge) has been released, and the mission deadline is June 10th to June 30th.
TASK 0004 content: https://github.com/baidu-ife/ife/tree/master/task/task0004
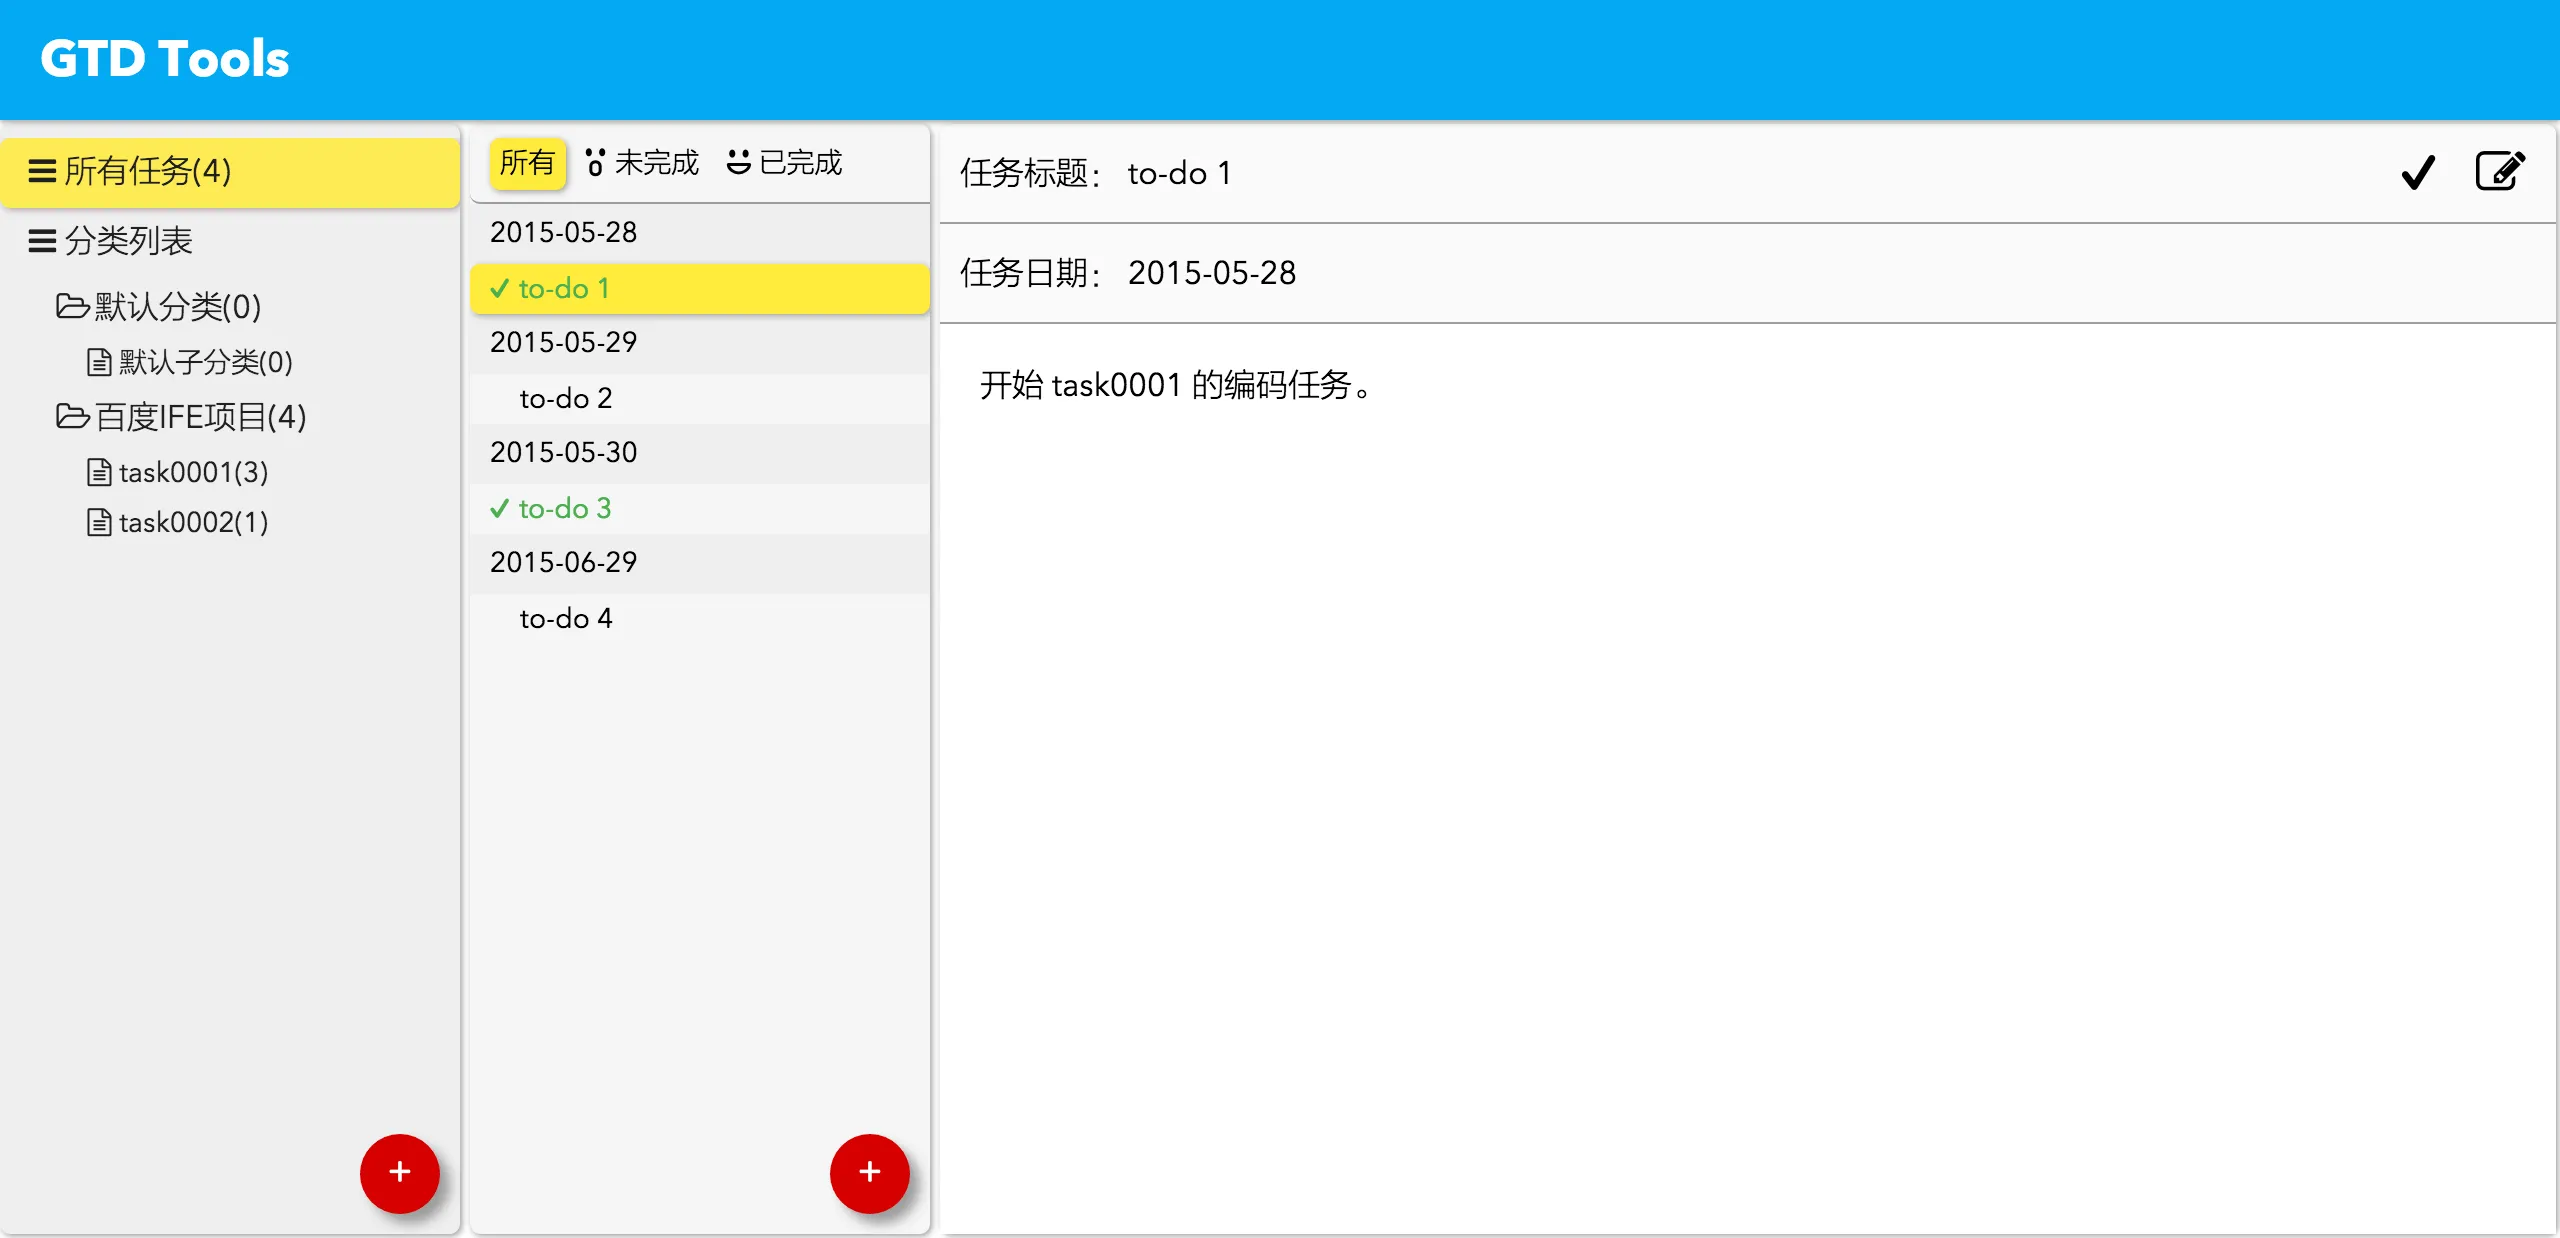
What I did: https://github.com/DIYgod/ife-work/tree/master/task0004
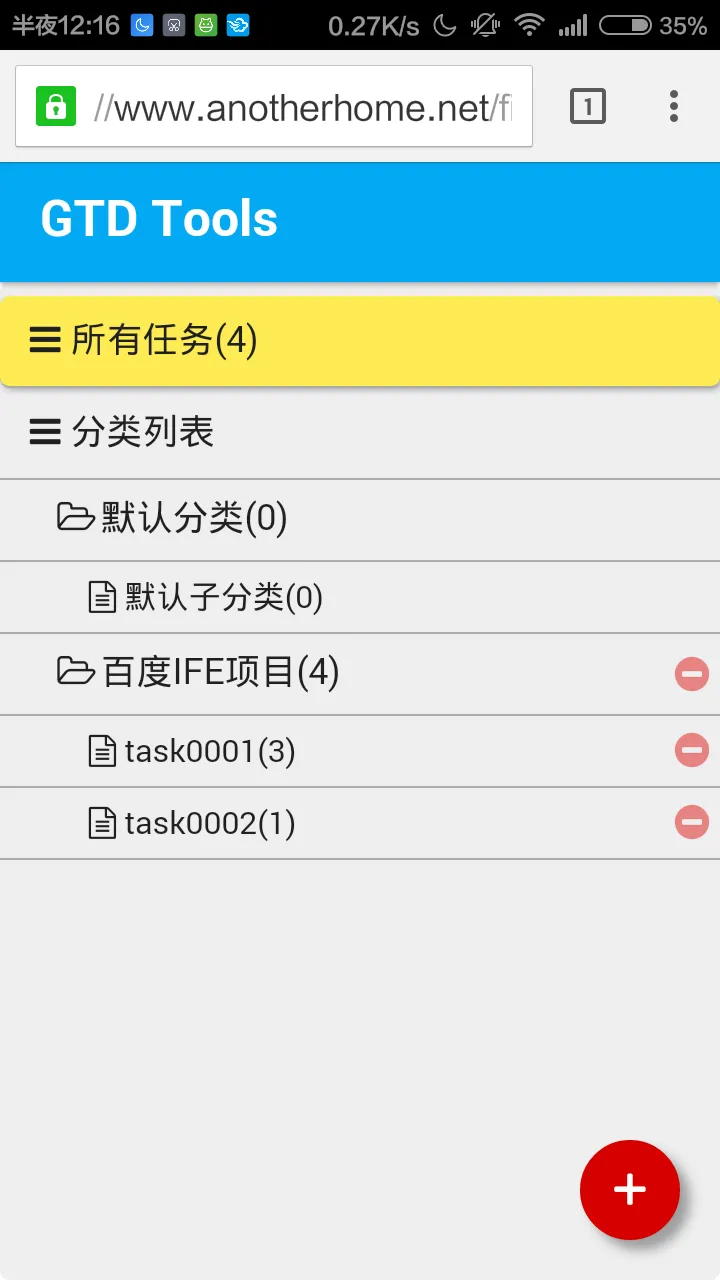
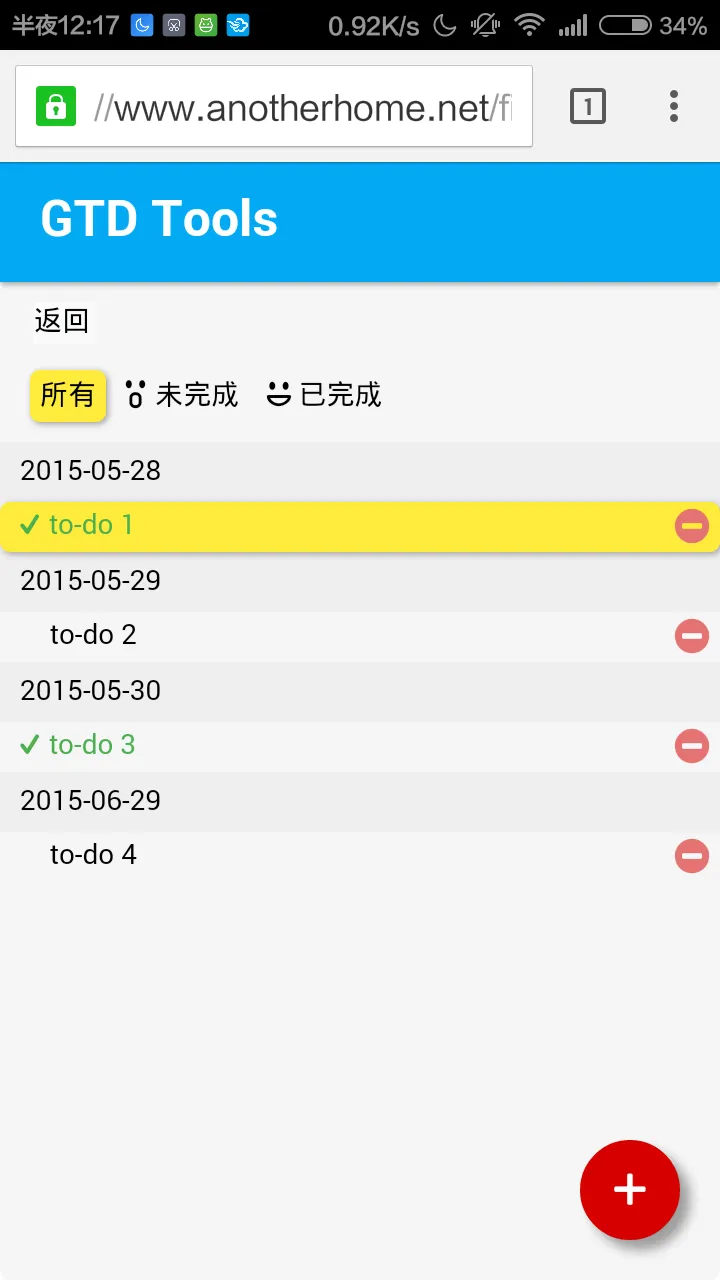
Online Demo: https://www.anotherhome.net/file/ife/task0004
This mission took 20 days (5.20-6.9) intermittently.
Below are some records of my work on TASK 0004.
Mobile terminal adaptation
“Two to three years ago, front-end engineers were still worried about whether there would be no room for survival in the mobile Internet era. But today, in our team, more than half of the work of front-end engineers is in the development of mobile Web or APP. The technical nature of mobile Web or APP is not essentially different from that of desktop Web, but there are many pitfalls in mobile. By learning this part, you can become a front-end development engineer for both desktop and mobile.”
The entire product was required to be a SPA. I had no idea at first. After looking at AngularJS for two days, I finally decided to implement it myself.
Reference Gmail:
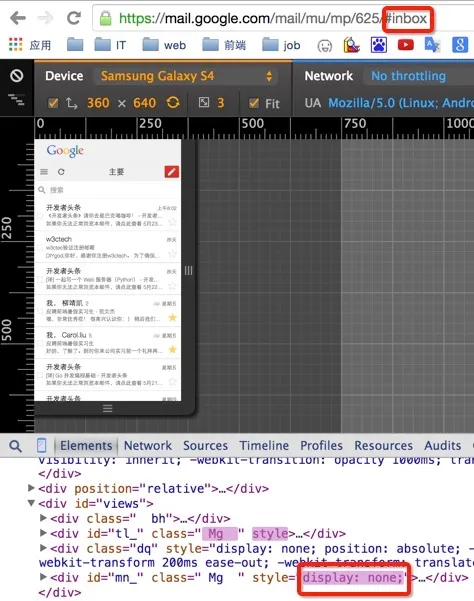
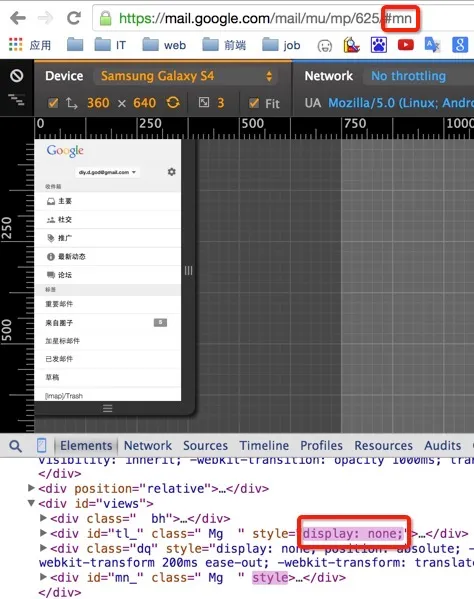
When switching to another anchor point, only the part corresponding to this anchor point is displayed, and other parts are hidden using display:none. But I don’t understand how it is implemented. Executing location.href = '#mn'; in the console can also automatically modify the display, indicating that the anchor point is bound and not switched through a click event.
Li Sheng Chicory told me that it is implemented by listening to the URL, similar to routing in MVC. I feel that it is quite difficult to achieve it myself… But I thought of another method, which is simply to use the target pseudo-class in CSS3. The demo is as follows:
See the Pen jPMgre by DIYgod (@DIYgod) on CodePen.
So by changing the CSS, it was easy to adapt to the mobile terminal.

It was Li Sheng Chicory who took me flying again. By analyzing Zhang Xinxu Chicory’s Mobilebone framework (official website), I found a better implementation, and the above implementation is invalidated 23333.
The principle is this: when switching anchor points, the onhashchange event will be triggered, so I bound a function to the onhashchange event. This function will record the anchor point before switching and the anchor point after switching, and perform corresponding actions by judging the anchor points before and after. During the switching process, certain classes in slide out in reverse will be added to the subpage, and the sliding effect is achieved through these classes. For specific implementation, see the CSS section below. After the switching is completed, the subpages that do not need to be displayed are hidden and the classes added before are cleared. that’s all.
JS part:
/* 滑动效果 */
window.onhashchange = function () {
    var newHash = location.hash;
    var oldEle = $('.' + oldHash.substr(1));
    var newEle = $('.' + newHash.substr(1));
    if ((oldHash == '#type' && newHash == '#task') || (oldHash == '#task' && newHash == '#details') ) {
        oldEle.className += ' slide out';
        newEle.className += ' slide in';
        newEle.style.display = 'block';
        oldEle.style.display = 'block';
        setTimeout(function () {
            newEle.style.display = 'block';
            oldEle.style.display = 'none';
            oldEle.className = oldEle.className.replace(/ slide out/, '');
            newEle.className = newEle.className.replace(/ slide in/, '');
        }, 225);
    }
    else if ((oldHash == '#task' && newHash == '#type') || (oldHash == '#details' && newHash == '#task')) {
        newEle.className += ' slide reverse in';
        oldEle.className += ' slide reverse out';
        oldEle.style.display = 'block';
        newEle.style.display = 'block';
        setTimeout(function () {
            oldEle.style.display = 'none';
            newEle.style.display = 'block';
            newEle.className = newEle.className.replace(/ slide reverse in/, '');
            oldEle.className = oldEle.className.replace(/ slide reverse out/, '');
        }, 225);
    }
    oldHash = newHash;
}
CSS part:
/* 滑动效果 from mobilebone */
.slide.out,
.slide.in {
  animation-timing-function: ease-out;
  animation-duration: 225ms;
}

.slide.in {
  animation-name: slideinfromright;
}

.slide.out {
  animation-name: slideouttoleft;
}

.slide.reverse.out {
  animation-name: slideouttoright;
}

.slide.reverse.in {
  animation-name: slideinfromleft;
}

/* keyframes for slidein from sides */
@-webkit-keyframes slideinfromright {
  from {
    -webkit-transform: translate3d(100%, 0, 0);
  }
  to {
    -webkit-transform: translate3d(0, 0, 0);
  }
}

@keyframes slideinfromright {
  from {
    transform: translateX(100%);
  }
  to {
    transform: translateX(0);
  }
}

@-webkit-keyframes slideinfromleft {
  from {
    -webkit-transform: translate3d(-100%, 0, 0);
  }
  to {
    -webkit-transform: translate3d(0, 0, 0);
  }
}

@keyframes slideinfromleft {
  from {
    transform: translateX(-100%);
  }
  to {
    transform: translateX(0);
  }
}

/* keyframes for slideout to sides */
@-webkit-keyframes slideouttoleft {
  from {
    -webkit-transform: translate3d(0, 0, 0);
  }
  to {
    -webkit-transform: translate3d(-100%, 0, 0);
  }
}

@keyframes slideouttoleft {
  from {
    transform: translateX(0);
  }
  to {
    transform: translateX(-100%);
  }
}

@-webkit-keyframes slideouttoright {
  from {
    -webkit-transform: translate3d(0, 0, 0);
  }
  to {
    -webkit-transform: translate3d(100%, 0, 0);
  }
}

@keyframes slideouttoright {
  from {
    transform: translateX(0);
  }
  to {
    transform: translateX(100%);
  }
}
Update: It has been tested that this method does not perform well in Safari.
Update again: To add to the above: This method does not seem to perform well on Safari on the mobile side, but it performs normally on Safari on the Mac side.
CSS Processing
“Due to its own language design problems and some browser compatibility issues, the CSS language often causes us to write a lot of redundant code when writing it, or write the same style setting several times for compatibility. In response to these problems, the concepts of CSS preprocessing and postprocessing and related methods and tools were born.
These tools and methods help us write more maintainable CSS code more efficiently. ”
After research, I finally decided to use the broader Less.
Less mind map compiled according to the MOOC tutorial (less is ready to learn and use):
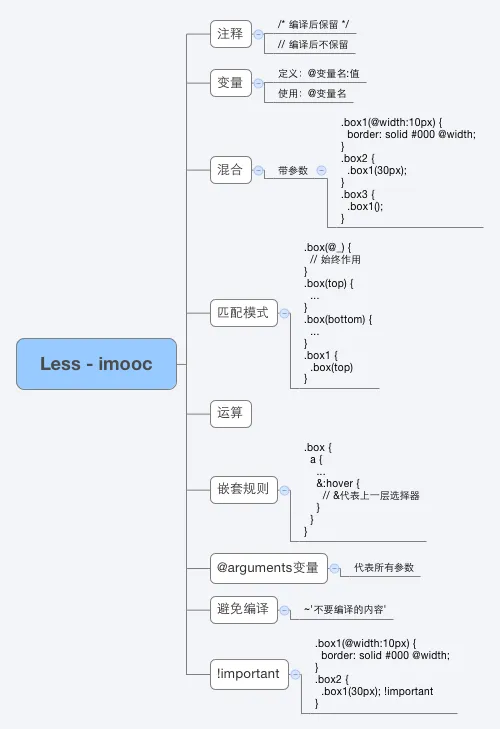
The CSS part has been refactored and can finally be reused, DRY (Don’t repeat yourself).
In addition, using autoprefixer in combination with Grunt to handle browser prefixes is simply not fun.
Security
“Safety is an issue that is often overlooked by everyone, but in fact, once it occurs, it will have a huge impact. Especially for students who have not experienced corporate development or have not stepped into pitfalls, if they wait to work in a company and do actual projects, it is very easy for safety problems to occur.”
There are loopholes in existing programs. For example, if you enter the following content in the task content and then save it, our customized script will be executed.
<iframe src=javascript:alert('xss');height=0 width=0></iframe>or
<img src="./attachments/1.html" onerror=eval("\x61\x6c\x65\x72\x74\x28\x27\x78\x73\x73\x27\x29")>So we need to do some simple XSS protection:
In most cases, user input is processed, only legal values are allowed to be entered, and other values are filtered out. However, taking it a step further, you can transform the tags.
Perform Html encode processing on the input content:
function htmlEncode(str) {
return str
.replace(/&/g, "&amp;")
.replace(/</g, "<")
.replace(/>/g, ">")
.replace(/"/g, "&quot;")
.replace(/'/g, "&#x27;")
.replace(/\//g, "&#x2f;")
.replace(/\n/g, "<br>");
}For example, user input:
<iframe src=javascript:alert('xss');height=0 width=0></iframe>After saving, the final stored content will be:
<iframe
src="javascript:alert(&#x27;xss&#x27;);height"
="0"
width="0"
></iframe>Later, when displaying, the browser will convert these characters into text content and display it instead of an executable code.
In addition, it comes with SSL bonus 2333
Performance optimization
“When you do some small projects by yourself, it may be some website projects in the school, the average daily traffic may not exceed 500, and most of them are accessed within the campus LAN; or you may develop some laboratory MIS systems, and you will never use the system you developed in this life. In such projects, performance optimization is often ignored by you.
But if you are building a website with an average daily PV of tens of thousands, hundreds of thousands, or even larger, the pages you develop will be accessed by users with different network conditions across the country. At this time, performance issues cannot be ignored. Under today’s network conditions, if your page cannot complete the first screen rendering in 3 seconds, your website will definitely lose a lot of users.
There are many links and tasks involved in optimizing the performance of the entire website. Most of the time, it cannot be completed by a front-end engineer alone. Especially in companies with clear functional divisions, it often requires the collaboration of multiple positions such as front-end and back-end, operation and maintenance, and DBA. Therefore, in our course, we mainly let you understand what aspects of the entire performance optimization are involved. At the same time, we will focus on introducing some technical points that can be focused on in the front-end field. ”
Modularity
“For a complex project, especially a complex project involving multi-person collaboration, how to reasonably divide modules, how to load modules more conveniently, and how to manage dependencies between modules are problems that a project team will face. Currently, the industry has some common solutions, such as AMD. In this section, I hope you can learn how to rationally plan project modules by learning the modularity of JavaScript, and rationally use modular tools to optimize your project code structure.”
After research, I decided to use RequireJS to implement it.
Change the JS reference method to this
<script src="scripts/require.js" data-main="scripts/main"></script>Then rewrite JS and divide JS into four modules: the main module gtd util selector. But it always feels like the division is not very good… You can only ask your instructor when preparing for your defense.
A problem was encountered:
There is such an HTML structure
<!DOCTYPE html>
<html>
  <head>
    <meta charset="UTF-8" />
    <title>Demo</title>
    <style>
      div {
        height: 100px;
        width: 100px;
        background: #eee;
        margin: 10px;
      }
    </style>
  </head>
  <body>
    <div onclick="myClick();"></div>
    <div onclick="myClick();"></div>
    <div onclick="myClick();"></div>
    <script src="js/main.js"></script>
  </body>
</html>
After modularizing it, it is obvious that myClick will no longer be a global function, so it cannot be called like this.
So I tried to bind the click event in the module:
define(function () {
  function init() {
    var myDiv = document.getElementsByTagName("div");
    for (var i = 0; i < myDiv.length; i++) {
      myDiv[i].addEventListener("click", myClick(myDiv[i]));
    }
    myDiv[0].click();
  }

  function myClick(ele) {
    ele.innerHTML = ele.innerHTML + "click";
  }

  return {
    init: init,
  };
});
However, the binding was wrong. You must have seen it, but I didn’t see it at the time, and because the sentence in line 5 indirectly called myClick(myDiv[i]), I mistakenly thought it was the result of the call in line 10 (this was just a demo, the situation at the time was more complicated than this, and the results of the two calls were indeed similar).
The result is that the click-bound function can be called within the module (mistakenly), but there is no response when clicked on the page.
Then I made some clever reasoning: the myClick function bound to the click event is not a global function and is only valid within the module. When clicking on the page, the myClick function is called globally, so there is no response.
It seems reasonable but it is not the case. After V2EX posted a question, an enthusiastic netizen 7anshuai saw the problem of incorrect binding. .
Then just change it to this:
define(function () {
  function init() {
    var myDiv = document.getElementsByTagName("div");
    for (var i = 0; i < myDiv.length; i++) {
      myDiv[i].addEventListener("click", myClick);
    }
    myDiv[0].click();
  }

  function myClick() {
    this.innerHTML = this.innerHTML + "click";
  }

  return {
    init: init,
  };
});
During this period, I also tried to actively expose functions in the module to the global space, like this:
window.myClick = myClick;Although it works, it really sucks. I’m glad I didn’t leave it at that…
6. Front-end engineering
“There are currently a lot of front-end development tools in the industry, which can complete some tasks that can be automated during the development process, improve R&D efficiency, improve the consistency of the development process when multiple people collaborate, and improve the operation and maintenance efficiency of the entire project.”
After research, we finally decided to use a combination of Yeoman, Bower, and Grunt tools to carry out engineering transformation.
Mind map compiled based on the MOOC tutorial (Grunt-beginner front-end automation tool):
Use Yeoman to create a new webapp project (needs to circumvent the firewall), install other required packages, change the configuration file, and then you can enjoy the extremely efficient and shocking experience brought by various automation tools~
Here I mainly compile the code with less, process CSS prefix HTML, CSS, JS compression and add md5 value to the file name. The pre-processed files are in the app folder, and the processed files are in the disk folder.
Done, waiting for graduation defense~